-->
≡
Home
Woman
Sport
Business
Health
Privacy Policy
Contact Us
Contact Us
How to Color with an Aqua Painter
:
:
2018-04-05T12:16:31Z
Thursday, 5 Apr 2018 - 12:16 PM
Watch the video
click to begin
Youtube
Welcome to this episode of Ink It Up with Jessica TV. I'm Jessica Taylor and
in this video I'm going to show you how to color with your aqua painters on
pre-printed designer series paper with your classic dye inks. I'm starting with
a pre-printed designer series paper. This is from the Petal Passion pack from
Stampin' Up! so the paper just comes black and white and it's perfect for coloring
on. That way you can use it with any of your different colors of cardstock. So
today I'm going to show you how to color it with your aqua painter and a Classic
Stampin' Pad which is a dye ink. So first you're going to want to put a little bit of
water in your Aqua Painter and I don't like to have it full, I like to have just
a little bit in there so I don't get too messy and you'll want a scratch piece of
paper that you can wipe your aqua Painter off on and a Classic Stampin' Pad
like I said. To get some ink in the lid of your ink pad you want to just squeeze
the lid down, kind of squeeze your ink pad together first, so that when you open
it you'll see that there is ink pooled in the lid and that's the ink I'm going
to use to color. So I'm just going to give my Aqua Painter a tiny squeeze to get a
little bit of water down in the brush and then I'll pick up some of that ink
and use it to color on my flowers. Now I'm not going to be real exact, I'm just
going to kind of lay down some color and you can come back and add more but if
you go too dark it's harder to take away so it's better to go a little bit
on the lighter side then to do it too dark. But I'm just going to go ahead and
color in all of the flowers this way.
Once you're done coloring all of your flowers you're just going to run your Aqua
Painter on your scratch paper until you get all the color out of it. So just run
it till it's clear and then you can switch to the green color for the leaves.
I don't know if I mentioned, but I used Berry Burst for my flowers and I'm going
to use Lemon Lime Twist for my leaves. So again I'm going to just squeeze my ink
pad together to get that ink pooled in the lid and then I'll just pick up some
of that ink and color in my leaves. If you find that you need a little more
water you just need to squeeze your Aqua Painter just a tiny bit.
When you're done coloring everything just be sure to wipe off your Aqua
Painter until it's clear again so that it's ready it to use for the next time.
Also, when you're storing your Aqua Painter you want to store it up so that
any water is stored down here and not falling down into the brush of the Aqua
Painter while you're storing it. So always store it up like this. For this
card once my flowers were dry I added a little bit of Wink of Stella. This is a
glitter brush so I added these just to the flowers and this just adds a little
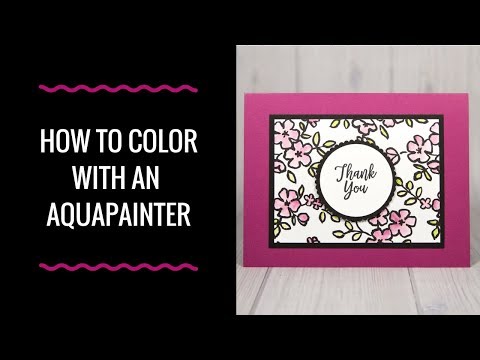
bit of glitter, a little extra shimmer and shine. So to put this card together
I used a Berry Burst card base, this is a finished size of four and a quarter by
five and a half so it's just eight and a half by five and a half paper folded in
half. My Basic Black card piece is three and a quarter inches by four and a
quarter inches and this flower piece is three by four inches. Then I just added
my circle greeting with dimensionals on top of that. So if you would like to make
12 of this card out of one sheet of 12 by 12 paper you're going to want to
watch my Quick Cards from 12x12 paper video for how to do that.
It's really quick and easy and a great way to use up your 12 by 12 paper to
make beautiful cards! Thanks so much for watching. I hope that you'll give this
technique a try and if you like this video please hit the thumbs up button
and don't forget to subscribe to my channel. Happy Stamping!
How to Make a Spinner Card with Circle Dies How to Color with Sponge Daubers How to make your own stamping tool | stamp positioner used with Altenew Stamps and Inks Nail Art for Beginners: How to STAMP!! Ink It Up with Jessica TV Episode #32: Watercolor Techniques 3 Ways to Step Up Your Cards - Ink It Up with Jessica Episode #38 Stamping Techniques - embossing with Embossing powder How to Reink an Ink Pad - Ink It Up with Jessica TV Episode 37 Tip to Make Cutting Card Layers Easier 3D Dynamic Textured Impressions Embossing Folders
Facebook
Twitter
Google Plus
Latest Posts