-->
≡
Home
Woman
Sport
Business
Health
Privacy Policy
Contact Us
Contact Us
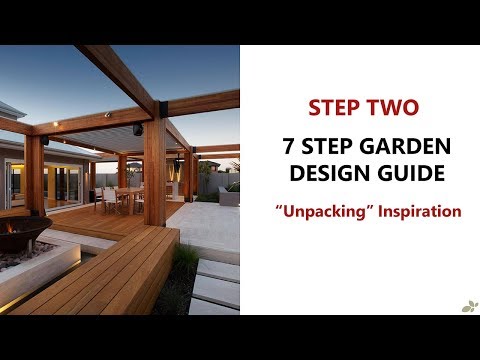
Step 2 - How to Design a Backyard Garden
:
:
2018-04-30T09:38:15Z
Monday, 30 Apr 2018 - 09:38 AM
Watch the video
click to begin
Youtube
Hi Guys, it's Matt from howtogardendesign.com, back again with part 2 of my 7 step garden
design guide. It looks at 'unpacking' inspiration to help you define exactly want
you want in your backyard garden.
This video will cover: • How to break down an image into individual
components • How to describe what you like about those
individual components o We'll do that through 2 filters – Physical
Elements and Design Elements – more about those later
• We'll then look at the importance of Changing it Up! How altering some elements
in the image will confirm you like (or dislike) something
• Finally, we'll summarise everything into a few flexible criteria to follow during
the design process I call this process 'unpacking' an image.
You put any image through this process and generate a list of flexible ideas or criteria.
The aim is to use it over and over and over again with different images. Over time you
will refine a list of criteria for any features, activities or areas you want to include in
your backyard. Some images may give you one idea, others will give you many.
It may seem like a lot of effort initially, but over time, you will use it unconsciously
when analysing inspiration or any space around you. Pretty soon you may not need to go through
all the steps, and can pick and choose things very quickly to add to your list of criteria
for the different activities, features or areas of your garden.
Let's get into it. Most people design their backyard in the following
way: they place certain activities or features where they think they should go in a backyard.
They then try to find images or inspiration to fill each area. This means each area is
designed individually with no links to others and often has no overall theme or concept.
We want to do the opposite – create a list of "criteria" for each activity or feature
we want and go through the design process to find the best area in the garden for them.
This requires flexible ideas that can be placed in many potential locations. It also lets
us use the local environment to shape the area for that activity or feature.
To create this list of flexible ideas or "criteria" we can unpack inspiration. The Step 1 video
outlined places to find inspiration – images, videos, and the world around you. We'll
focus on images as they're easy to find and plentiful.
We can use a single image for an activity or feature, or multiple. You may only like
1 thing in the image, or many and want to copy them all.
This process helps you define what you like in each image and create a list of MUST or
MAYBE criteria for each activity or feature you want to have in your backyard. One thing
to stress before we begin; creating a list of criteria for an activity or feature doesn't
mean you MUST include it in your design. It's simply there, ready to go, if you decide you
want to include this activity, feature or item.
As we'll see when I go through the process, not every item I unpack will be crammed into
a design. Over time, through unpacking images, I will build a list of criteria for each area
or activity that will form the basis of my design.
WHY DO WE DO THIS? When you start designing, it's easy to get
lost in the details. You can redesign the same area again and again and again and again
and again. Knowing when to stop and move onto to another area can save time.
How do you know when to stop? Unpacking images and developing criteria gives a you a checklist
to follow for each activity or feature in your backyard.
Ensuring you have ticked each box will let you know when you can move onto another area.
I'm getting ahead of myself, but this gives you an idea of what this process aims to generate.
The design process is cyclical and you will no doubt come back to change and refine areas
a few times.
Good design uses the site and environment to shape the areas, activities or spaces you
are designing. Don't make it something you can cut and paste into any location. Use the
unique aspects of your backyard or garden and incorporate them into your design. But
again, I'm getting ahead of myself a little.
If you haven't given it much though just yet, it can be helpful writing down a simple
list of all the activities or features you want in your backyard. You may have an image
or 2 already for inspiration. Take one or quickly find one now to follow through the
unpacking process as I go through it.
So let's have a look at unpacking.
I have this image from a backyard by Ritz Exterior Design in Perth, Australia. I'll
go through the process and unpack what I like in the image. I'll develop some flexible
criteria of Must or Maybe ideas I may want to use in my design.
The best way to approach this is to break the image down into individual components
which are: physical items or activity/ feature areas. We then look at these components through
two lenses – the physical elements and the design elements – which I'll describe
shortly.
For example, my components in this image may be physical items like the fire pit, the bench
seating, or the timber framework. Or the components may be an area for an activity, such as the
dining area (including the decking and paving), the kitchen area or a feature like the garden
beds.
To get started on your image, take a piece of paper and write down on one side any components
in the image you like.
Next, make 2 columns – one for physical elements, the other for design elements.
Physical elements are the size, the shape, the colour/s, the materials and the finish
of the materials for a component.
Design elements consider what function a component provides – think shade, noise reduction,
additional seating etc. Also the layout of an area – how the items in that area shape
the space and change how it feels. Finally, the combination or contrast of materials,
and any other things that interest you. It's a little more theoretical but should get you
thinking about spaces a little differently.
These descriptions aren't rigid – they're just some extra things to consider when looking
through your image. Let's go through mine and outline some of the components that pop
out to me. I'll make some notes on the physical and design elements I like as well.
The big one that caught my eye is the timber framework.
Physically, I like the heavy timber beams. Design wise, I love the concept. Having this
framework helps separate the backyard into rooms. You have a support structure in place
to provide any shelter or protection if needed, and it's flexible enough to apply to many
different environments – such as a sloping backyard.
I also like the fire pit. I like the steel material and the shape of
it. I also like the way it's raised, allowing
you to rest your feet near it like an ottoman. It appears to be gas, which is easy to maintain
and consistent, if not as rustic.
Finally, the dining and kitchen area. I like the use of timber and paving - the
combination of timber and paving providers a warm and cool colour and material palette
easy to apply to other areas. The paving is a nice light colour, so you won't burn your
feet during summer. The functionality of having a good kitchen
outside is also useful. Finally, the vergola above the table provides good flexibility
depending on the weather.
So those are some of the components I like in this image. Now we are going to do something
many people wouldn't think of, which will help us decide how much I like the things
I listed.
This next step requires you to use your imagination, or better yet a little bit of sketching and
drawing, just to help us test some assumptions we've made. What we are going to do is 'Change
It Up'. We're going to alter some of the elements
of a component – think size, colour, material, position – and see if that changes our mind
on what we wrote down previously. If you can look at the image and imagine the changes,
that's fine. If not, grab another piece of paper and it's time to start sketching.
Don't be afraid, these are working drawings, not a final plan – the messier the better
– and you'll see that with my bad sketches later!
Let's look at my first element and make a few changes to see if I really do like it
as it is, or if there is some flexibility in how I can implement that idea.
Currently the beams are timber – what if I change the colour to a darker or lighter
shade? What if I make the beams thinner, but only 1 solid beam? What if they are steel?
Or another material? And what if I change the shape- perhaps curve them?
You can see my sketches are terrible – all they have to do is represent some changes,
to give me an idea of how it might look. Short and sweet.
Personally, I like the timber over steel, and prefer the straight lines over curved.
I also like the square cut rather than cylinder. Finally, the thickness is good, but I could
see myself choosing something thinner if needed. Overall, the timber frame concept is a great
one, and in terms of materials I'd probably consider some other elements in my overall
design and see how timber I use elsewhere will dictate the exact size and shape of the
beams. Another consideration down the line – although less of a concern now – is
the availability of materials and the cost. These may influence what I can use and the
sizes and lengths of the beams.
Next, let's look at the fire pit. Let's change the material – what if it's a solid
stone basin, or perhaps set into a bench? What if it's a long thin line rather than
a bowl? What if I lower the pit closer to ground level?
Once again, nothing about this specific fire pit is a must for me. I like the concept of
it more than this specific design. I do like the raised level however, so that's something
I'll make note of in the final step.
What about the dining and kitchen area? Let's swap the materials – paving in, decking
out. What about the size of the pavers? Large vs small? Or the width of the timber slats?
And let's remove the vergola – leave it open. Or can I replace it with a ceiling?
The kitchen is a bit hard to see, so let's leave it for now.
I think I prefer lighter paving – better for summer, as I said earlier. The shape of
the paving is nice, but I'd probably be OK with changing it in my design.
So, having changed a few of the elements of each component, I have a bit more of an idea
of what is a must and what is a maybe. The final step involves writing down a few key
points – or criteria – for this image, or better yet, for any activities, features
or areas I've unpacked.
Taking another sheet, I can make a simple heading for each component. Under these, let's
summarise my notes above.
Fire Pit – Material flexible. Gas if cost effective. Shape flexible (like the idea of
a longer line or surface area). MUST be raised or have bench/ rest area for feet (provided
it can be safe).
Timber Framework – Concept great (include if possible). Square cut timber preferred.
Size and specific timber to match potential decking/ other timber used.
Dining/ Kitchen – decking colour flexible. Prefer thinner slats.
Paving colour – prefer lighter colour. Paver shapes flexible (prefer thinner) based on
other material choices.
You will notice that I have mentioned a lot of physical elements and labelled them flexible.
This means I like the component but am not in love with the material choice, colour,
size, shape etc. I will probably find another image later on that has a material palette
I prefer. When that happens, I can add those elements to the list of criteria for each
activity or feature. This will help me refine the list of criteria and connect different
areas through using the same materials, colours or other physical elements.
One thing to keep in mind is that although I haven't necessarily created any MUST criteria
from this image, it has helped me uncover a few concepts I'd like to try and add into
my future design. I love the timber framework idea and will keep it in mind when designing.
Also, the addition of a fire pit and kitchen area – assuming I have the money and inclination
to spend it. Same thing with materials – I like the decking and paving areas, even if
I won't use these exact materials. Perhaps going through a few more images I will find
something I really like. I have my 'concept' of a decking or paving area already – now
I can add a specific colour/ shape/ size/ material to it. If I don't find other materials
or finishes I really love, it may come down to what is cost effective and available at
the time – again, the idea or concept is flexible, allowing me to get what I want,
but adapt to local conditions and constraints such as money, availability etc.
Remember, this process is all about gathering inspiration and defining some concepts or
elements you like and want to apply to your design. Over time looking at images you'll
build up a list of criteria for your fire pit, framework, dining area, or perhaps another
new activity or feature you hadn't considered but now want to include. Or you'll find
an idea that links different areas of the design together – like the framework in
my image.
Going through this process will help you build that flexible list of criteria and allow you
to try different things in different parts of your site. You can see what works and what
doesn't and use your environment to create something unique and personal to you.
So to summarise the 4 steps: • UNPACK - Collect images and break them
down into components you like • DEFINE - Analyse and describe the different
physical and design elements you like about these components.
• CHANGE IT UP - Change the elements around and test if the elements are a MUST or a more
flexible maybe • CRITERIA - Write down what you've discovered
in a few key points – your list of criteria
I hope this video was helpful for you – feel free to leave a comment, subscribe, like or
dislike it, and check out more on my channel or my site; howtogardendesign.com
Primitive Technology:Fish Pond-part 1!Primitive life-wilderness! Step 1 - How to Design a Backyard Garden How to make bonsai pot with jut bag or coarse cotton cloth and cement Build your own swimming pool START to FINISH 10 Outdoor backyard makeover design ideas How to create a Bonsai tree (DIY) Create a cottage as tree pot 180 Winter Garden SuNrOOm Design Ideas How To Build a Backyard Waterfall How to Build a Pergola | Mitre 10 Easy As
Facebook
Twitter
Google Plus
Latest Posts