-->
≡
Home
Woman
Sport
Business
Health
Privacy Policy
Contact Us
Contact Us
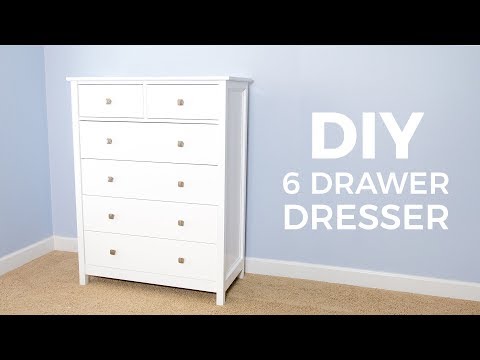
DIY 6 Drawer Tall Dresser | How to Build
:
:
2018-05-03T19:03:12Z
Thursday, 3 May 2018 - 07:03 PM
Watch the video
click to begin
Youtube
What's up guys, I'm Brad Rodriguez from Fix This Build That and today, I'm gonna show you
how to make a DIY Dresser. I made this one for my daughter
And I got all the materials for the build at the local home center
Now this build has easy joinery that anyone can do stay tuned
I'll show you just how I did it the DIY dresser is made from 3/4 inch plywood and dimensional lumber
I started by breaking down the plywood into manageable pieces with my Kreg Accu-cut guide
and my cordless circular saw
Next I took the smaller pieces to the table saw my cut parts for the sides of the dresser
These plywood panels will be joined to the legs using pocket screws
so I drove pocket holes down the length of each panel
The legs are made from two by twos
I cut all four of them to size on my miter saw using a stop block for the repeated cuts
I lined up the legs and I mark the ends to keep them in order and then I laid out cut lines for a groove or
a rabbet on the inside of the back legs
this recess will hold a quarter-inch plywood back panel flush on the back of the dresser when I install it and
The rabbet cut can be made with two cuts on the table saw
The first cut defines the width of the rabbit and the second one defines the depth and it also frees the offcut
And this feature could also be made with a router bit if you don't have access to a table saw
To assemble the sides I laid some
3/4 inch spacers on my bench to lift the plywood panel up to the same height as the legs
I put glue on the legs and then I clamp them in place and secure them to the panel with pocket screws
Now flush fit on the inside is gonna. Let me mount the drawer slides easily later.
I cut two pieces of trim to size to finish off the outside of the side panels a
1 by 2 glued and Brad nailed to the top and a 1 by 3 for the bottom gives the side panel a nice frame
and panel look
to give the dresser a little more detail I trimmed the frame of the sides with cove molding
I cut one into the molding take it to the side
Mark the fit for the next miter and then make that cut I like to mark
just slightly long when doing miter work like this
And after the initial cut I'll test fit and then take whatever little bit needs to be off after that
I'd rather sneak up on this cut then to cut it too short trying to get it right the first time
When all the parts were dry fit I came back and secured them all with a 23 gauge pin nailer
but a brad nailer or finish nails works fine here to
The sides of the dresser are connected by a bottom panel and stretchers on the top and middle
Which make the opening for the top drawers? I cut the bottom in the back stretchers from 3/4 inch plywood
But for the visible front stretchers and bottom trim. I use 3/4 inch solid wood
I drilled pocket holes around the bottom panel to connect the trim and secure the sides
I also drilled holes in the ends of the stretchers to join the sides
now all these holes are going to be hidden after assembly
For the bottom panel
I started by attaching the solid wood 1 by 3 trim to the front
then I secure the plywood back to him the same way
Securely clamping everything to a flat bench or work surface is really key here
Since you can't see the top of the joint with a panel upside down
In my design the legs stand proud of the drawers in the front trim by 3/8 of an inch
I like the extra shadow lines and interest this gives the piece
So I marked a reference line for the setback on the front of the legs and
then I secured the bottom panel in place with pocket screws
Then I moved up and secured the top stretchers in place as well
using a scrap piece clamped down to position the stretchers helps
keep them aligned while screwing them down
I measured down to establish the drawer opening for my top drawers
Then I clamped the scrap in place for reference and secured the middle stretchers as well
With all the cross pieces connected to one side
I moved the assembly out of the way
And then I laid down the other side on the bench and put the assembly on top
And working with gravity on my side always seems to go a little more smoothly
After I attached the bottom and top stretchers I cut the center divider for the stretchers
I sized it based on the opening between the stretchers on the other side
This helped me make sure that the opening on this side was the exact same as the first one
To finish off the connections on the top
I install the center divider on the front and cut another one that I attached between the back stretchers
The drawer slides for the top drawers need an attachment point in the center
So I cut and installed a piece for that as well
Now both Center dividers in the center mounting cleat are from 3/4 inch solid wood
So the mounting surface is going to be flush on both sides
With all the cabinet structure done I moved on to making the drawers for the dresser
This dresser has two small top drawers that fit and the openings
that I just made and a bay of four drawers that will fit
down below in the open space
The drawers are made from 3/4 inch plywood and
actually made a whole separate video on how to make easy
DIY drawers when I made it I
Go into a lot of detail around sizing drawers working with undersized plywood
versus full 3/4 inch stock in two different options for drawer bottoms
There's a link in the video description and a card up above if you want to check out the detail of how to video
Now the heart of the drawers in this entire build is the pocket hole joinery?
I want to thank Kreg Tool the sponsor of today's video who makes the
K4 Pocket hole jig and many other jigs and clamps that I use and a lot of my builds
The K4 jig is great for making a lot of pocket holes quickly and it's much faster than the smaller jigs
I'll have a link down below in the description to the K4
Along with the other Kreg tools that I used today like the Accu-cut track and the cabinet hardware jig that
I'll be using to install the drawer pulls
Before mounting the drawers I installed a quarter inch plywood back panel
into the rabbet grooves that I cut earlier I
Nailed in place with 18 gauge brad nails, and this helps keep the dresser square and prevents racking oh
And you probably noticed. I painted the cabinet white I just used the semi-gloss white paint nothing special here
To mount the drawers an account for the 3/8 of an inch
setback I set a scrap of plywood flush to the front of the middle stretcher to represent the false drawer front
I set my combination square flush with the back of that piece of plywood
and this gives me the distance to set back the drawer slide
Hardware I started at the bottom of the dresser cabinet
And I used a 1 by 4 as a spacer for the first drawer slide to sit on
then I pre-drilled and attached the slide with screws
I switched to a larger spacer for the next drawer slide and clamped it in place on top of the first slide
Using full sized spacers like this makes the drawer slide install quick and easy
just clamp the spacer in place to keep it from falling
Then position and attach the drawer slides for each drawer
An easy way to size a spacer like this is to take the distance that you want from the top of one drawer to the
top of the next drawer, then just subtract the height of your drawer slides
And this is going to give you consistent spacing between your slides,
and it makes install a breeze for these full extension drawer slides
to install the bottom drawer
I laid down a few strips of plywood offcuts to lift the drawer up off the base
and then I started attaching the drawer slides I
Pulled the drawer out enough to get to the first mounting holes
Then I flushed up the slide with the front of the drawer and secured a screw on each side
Next I pulled it out a little further and secured another screw on each side
I took out the door completely to access the back mounting holes and
put a third screw on each side then reinstalled the drawer
For the next one I use two plywood scraps stacked on each side of the lower drawer as spacers
Then I just repeated the same steps as before to secure the three screws per side
I repeated this two more times, and I had all four drawers installed
The top drawers, I installed the slides the same way as before
using a small spacer my combination square to offset the slides
Then I used the plywood strips I used for the bottom drawer and
mounted the drawer in the slots the same way
And once you do the mounting process it's pretty straightforward to do any drawer
You just need to have the right combination of spacers for your application
Next I made the top for the dresser
I was gonna go with a solid wood glue up for the top
But I had plenty of plywood left over and I wanted to put it to use
so I cut a plywood center panel and I drill pocket holes around the edge to attach a picture frame mitered trim
I used 1 by 3's for the mitered frame to give a nice solid wood look around the edge
and then the paint will hide the transition to the plywood panel
I cut the miter similar to how I cut the cove molding for the sides earlier
I did this all the way around the panel until I had four fairly tight-fitting miters.
I attached the miter frame with pocket screws and glue making sure to get lots of glue on the miter joints
After securing all the pieces I flipped it over and cleaned up any
glue squeeze-out before moving on to the drawer fronts
The last part that needed to be cut or these false drawer fronts
I cut the drawer fronts from plywood and I sized them for an eighth inch reveal around each drawer
Now in the past. I've used spackle to seal the edges before painting
But I wanted to try iron-on edge banding this time the banding has a heat-activated glue
And you just press a hot iron on it after it cools down and dries
You just come back with a chisel or a razor blade and trim off the excess now honestly
I didn't like this approach it took just as long as the spackle and
trimming the excess of the banding was a bit finicky
I painted the top and the drawer fronts, and then I was ready for install
To put the drawer fronts on I drilled holes in the drawer box and then positioned the drawer front
now for inset drawers like these I use a card trick to get perfect spacing
I set the drawer front on the opening then fill the gap on the top with as many cards as I can
Then I split the stack in half and put 1/2 under each end of the drawer
And this gives a consistent gap on the top and the bottom
I Use the same trick for the sides, and then I attach the drawer fronts with screws from the inside
For the lower drawer fronts I start from the bottom
And I used an eighth of an inch spacer on the top of the drawer to position the next drawer front it
Went quickly and then I had all the drawer fronts in place for the dresser
The top of the dresser is attached using some small cleats that I cut for the top I
screwed the cleats between the top stretchers, then I pre-drilled holes through the top of each of them
I center and clamp down the top, and I attached it with screws since I'm attaching into plywood
I don't need to factor in any wood movement. Which is really nice
Now the last bit of cleanup was to install the drawer pulls
I use my Craig cabinet hardware jig which helped me easily Center the poles on the upper cabinets
Then I made an adjustment for the larger lower drawers and finished off the lower drawers with knobs
Lining them up with the top drawer for a nice neat line of pulls
And here she is all buttoned up now if you've got a good eye
You probably noticed a bevel on the underside of the top that wasn't there just a second ago
I noticed something a little bit off about the piece and I decided to throw this
45 degree under bevel on the top at the last
Minute it really added that great finishing touch.
I think it needed my daughter is super pumped about her new dresser
If you wanna build your own DIY dresser, there's a link down below in the description you could check it out
It'll take you to the plans that have 3d parts diagrams a cut list as well as all the materials and step-by-step
instructions that you'll need
If you're not subscribed to the channel already I'd love to have you as part of the team and until next time guys
Get out there and build something awesome
Floating Epoxy Waterfall River Table | Woodworking How to Build 5 Ways to Print on Wood | DIY Image Transfer Easy DIY Drawers with Pocket Screws | How to Make 3-in-1 Nesting Step Stool | How to Build DIY Project Journey of a Master Craftsman: In the Shop with Alf Sharp Part 1 Pen Turning with Basic Tools | How to Make a Pen Beginner Mistakes on the Lathe | 6 Days of Beginner Woodturning Day 3 How to Use a Planer - Setup & Maintenance How to Turn a Bottle Stopper | 6 Days of Beginner Woodturning Projects Day 1 DIY Clothes Drying Rack | How to Make
Facebook
Twitter
Google Plus
Latest Posts